
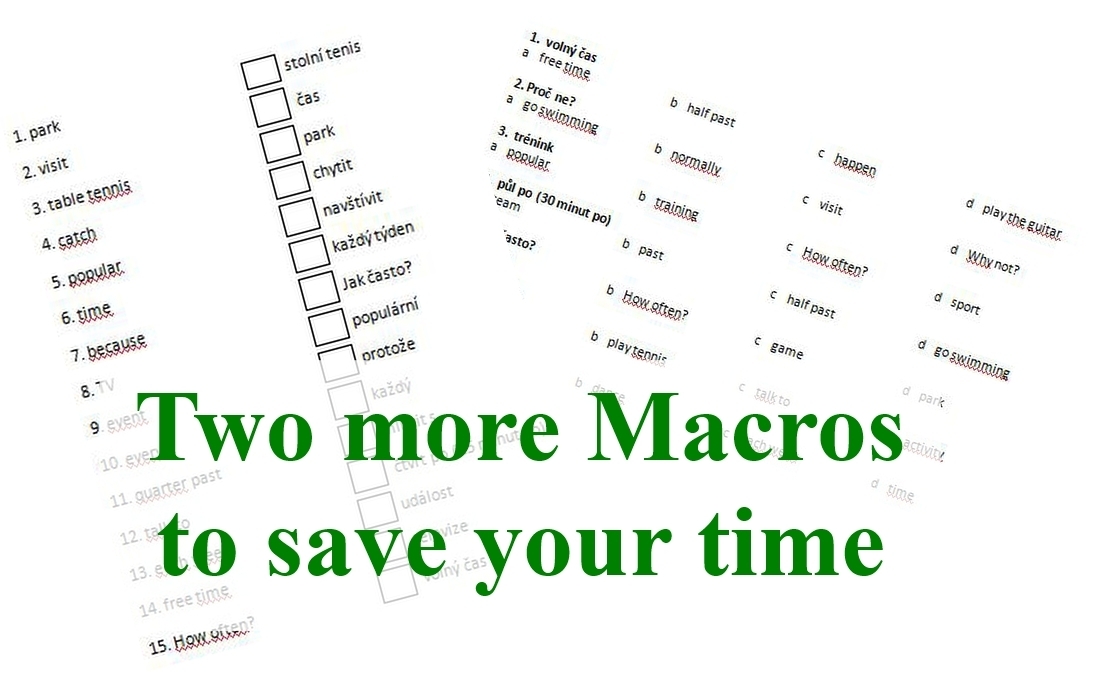
Recently I wrote a post where I share two macros which help you make a simple vocabulary revision tests really quickly. You just type the list of words, run the macros and print the tests.
(more…)
Lesson preparation can take a lot of time. Here you will find two Microsoft Macros that will save some time for you.
In the post Microsoft Word for Language Teachers – Part 1 I explain how to use the Teacher´s Pet add-on and I share a simple macro to create the Swimming Pool worksheets. In this post, I am going to offer you more macros which will help you create vocabulary worksheets in no time.
ADVERT:
[showmyads]
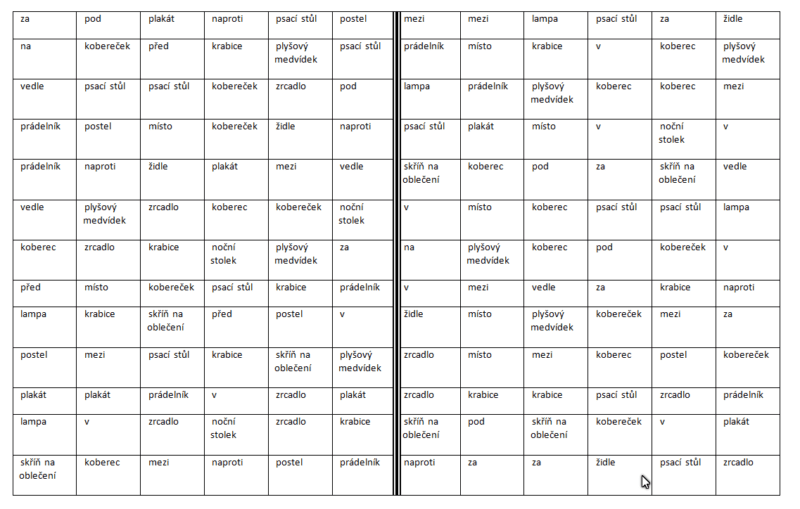
Noughts and Crosses
Noughts and crosses is an activity which I published in English Teaching Professional (Issue 105). “For this activity, you need to prepare two worksheets. Worksheet 1 (one copy per student) has a grid, usually 12×13, in which your target words are entered randomly in the students’ mother tongue.”(English Teaching Professional, Issue 105, page 8) It is really difficult to prepare such a worksheet. That was why I created the following macro:
You can see how to insert the macro into Microsoft Word in the following video:
Type your list of words + their translation. Change the page to landscape view. Change the numberofwords value to the number of words in your list. Click Developer and find the Crosses and noughts Macro. Run the macro and your worksheet is finished. (See the video for more detailed instructions.)
Once you have this worksheet, print one for each student in your group. Moreover, you need to prepare a list of words which you used in the worksheet (a simple table with the words and their translation will do).
Tell the students to take the list of words. Read the words aloud and ask them to repeat. Do this at least twice. Then give your students about two minutes to learn the words from the list.
Then they put the list of words away and play the game noughts and crosses. One of the students plays noughts and the other crosses. Before they can place a nought or a cross anywhere in the grid, they have to say the corresponding word in English. If their partner agrees that the word is correct, they can place their symbol into the given square. However, if they do not agree, they need to check using the list and if they are wrong, they have to play somewhere else.
The aim of each player is to create a line of 5 uninterrupted symbols. These can be in line, diagonal or in a column and there must be no free spaces in the line. I usually let my students play for seven minutes and then I stop the game.
Then students have 4 minutes to write as many words into their grids as possible. They may use the word lists but they mustn’t skip any words. The best performance has been 8 full columns.
More activities
The grid which we create with the previous macro is very versatile. I use it for two more games.
The first one is called Spill the Beans. Each student gets the grid and 4 beans. They spill their beans on the grid and they have 30 seconds to say all the words their beans cover or touch. They get one point for each correct answer.
The second game is called Tennis. Make the middle line of the grid thicker so it looks like the one in the picture below.
Students need a bean and a pencil. One student puts the bean on her half and pushes it with her pencil to the other half. Then she has to say the words the bean covers or touches. Students get one point for each correct word. Students play for 7 minutes and the winner is the one who gets more points.
If the bean doesn´t cross the thick line, their partner gets an extra turn and she says all the words the bean covers or touches. Put simply, if the bean is on your half, you try to push over the net (the thick line) and your partner says the words. If the bean stops on the rival´s half, you say the word.
Again, when the game finishes, I ask the students to fill in as many columns as possible in four minutes.
Microsoft Word – Remembering tables
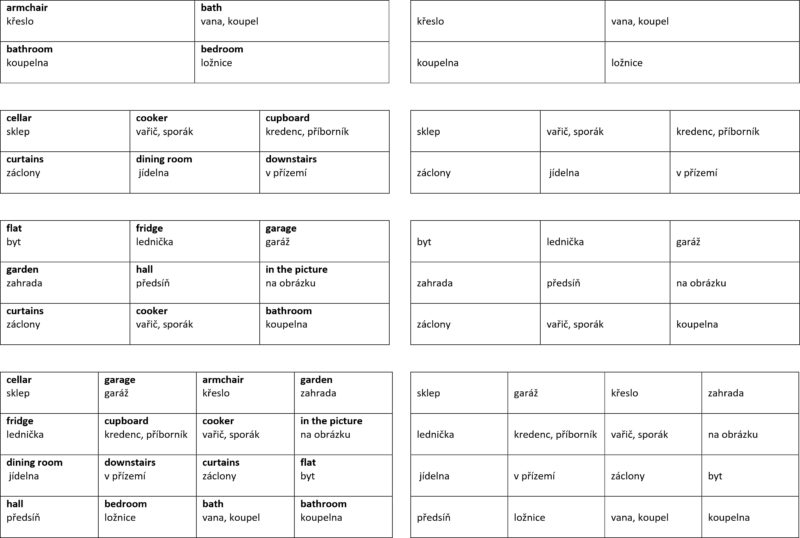
Remembering tables is a simple, yet effective, activity to teach new vocabulary using students’ mother tongue. For this activity you need a worksheet which consists of four pairs of tables. On the left there are tables with the English words and their translations. On the right, there are the same tables but without the English words. You can see such a table below.
Obviously, it is not easy to create such tables and that is why I asked an expert on Microsoft Word to create the macro for me. This time, you need to download the following file.
Before you open the file above, you must create a list of 16 words+their translation in Notepad. Save the list under any name but make sure that you save it as Unicode. (Don´t ask, I have no idea what this is 🙂 ) Then download the file above and Select the file you created in Notepad. Beware, the macro will not work if your file doesn’t contain exactly 16 words and they are not in Unicode. (See the video below for detailed instructions)
And how do you use the remembering tables? Start at the top. Read the English words in the first table and ask your students to repeat them. Do it at least twice. Then the students have 20 seconds to remember the 4 words from the first table. After the twenty seconds, they cover the table on the left and try to complete the table on the right. When they finish their work, they look at the table on the left and check + correct their answers. If they cannot remember any word, they can have a look and complete the table on the right with this help.
You do the same with the rest of the tables. The only difference is the time the students have for learning the words. For the second table, they have 30 seconds, for the third they have 45 seconds and for the last one they have only 40 seconds because all the words there have already been taught.
I hope you will find these macros and activities useful and that you will use them in your lessons. If you have more ideas for Macros, share them in the comments below.
Do you use Microsoft Word? Do you create worksheets and teaching materials with it? You are not the only one. Microsoft Word is the most common piece of software teachers use. It is really easy to use and it can do nearly anything. However, it can do much more! It can make your lesson preparations really easy!
In this post, I would like to share several macros I have been using for years. These macros save a lot of time and make my lessons are more interesting. I will share the add-ons and macros to create some of the activities I have been using daily (or at least weekly 🙂
ADVERT:
[showmyads]
Teacher’s Pet for Microsoft Word
Have you got a pet? No? You will!
Teacher’s Pet is a set of macros you will love. There are many things that you will be able to do. You can create crosswords, wordsearches, flashcards, jumbled texts and much more. You can download it here: Teacher’s Pet.
How does it work? Simply, download the programme and install it on your computer. There will probably be several hiccups during the installation as the original Microsoft Word tries to prevent you from making any changes but you will find instructions and help here.
Once you install it, there should appear a new tab in your Microsoft Word. It is called ADD ON and when you click it, you will see the icon with a dog and it is the Teacher´s Pet. So, what shall you do with it?
Simple Crossword
I often create simple crosswords for a vocabulary test. You just type the list of words + their translations (type the WORD+Translation). Add a solution at the top of the list and then click Simple Crossword and the macro will create your crossword. You can see a video of the process here.
Flashcards
Another Teacher’s Pet macro that I use frequently are flashcards. To create flashcards, you need to create a table with two columns first. The first column contains the words and the second can contains the translations or pictures. Then you click FLASHCARDS and two files are created. In one file, there are the words, and in the second there are the translations or pictures. Then you just print the first file, return the paper into your printer and print the second file. See the video:
There are 24 macros in Teacher’s Pet. Twenty are free and four are premium and you have to pay for them. Some of the macros do not work perfectly, for example Verb Tense Test, but most of them are fine and worth having. They will save you a lot of time.
Once I got to know Teacher’s Pet I got inspired and started programming simple macros myself.
My original macros
One of the activities I have been using a lot is called SWIMMING POOL vocabulary activity. You can find its description here. To do this activity, you need a worksheet with three columns for each student. In the columns, there is a random selection of the words you want your students to learn. When I started creating these worksheets they took a lot of time. So I wrote a macro and now it is a breeze. Here is the macro.
To use this macro, copy the text, open the DEVELOPER tab, Macros, Create New and paste it there. You can see the process in the video below:
Type your list of words+their translation. Click Developer, find the Swimming Pool Macro and change the value Numberofwords to the number of words you really have. This value is set to 29 by default. If you have fewer words and you do not change the value, there will be some empty squares in your worksheet. Click the run button and the grid should appear. See the video demonstration.